Pages

Monday, December 24, 2012

Did You Know That...

Hi everyone!
In case you haven't heard of mameshiba, they are these adorable little chibi dog-like beans that can talk and are always ruining peoples' appetites with their strange or disgusting facts. I know that sounds weird, but they happen to be an adorable meme (and who doesn't like something associated with Kyary Pamyu Pamyu???).  Anyway, I spent the weekend with my lovely camp friend Brie, and we did our nails together!!! I'm so proud, I've gotten her into nail art :)
Both of us were debating what to paint, and we ended up deciding on mameshiba. We used two Sally Hansen quick dry polishes whose names I do not know as well as two Essies whose names have also slipped me, unfortunately. The yellow and green are the Sally Hansens and the pink and blue are Essies.
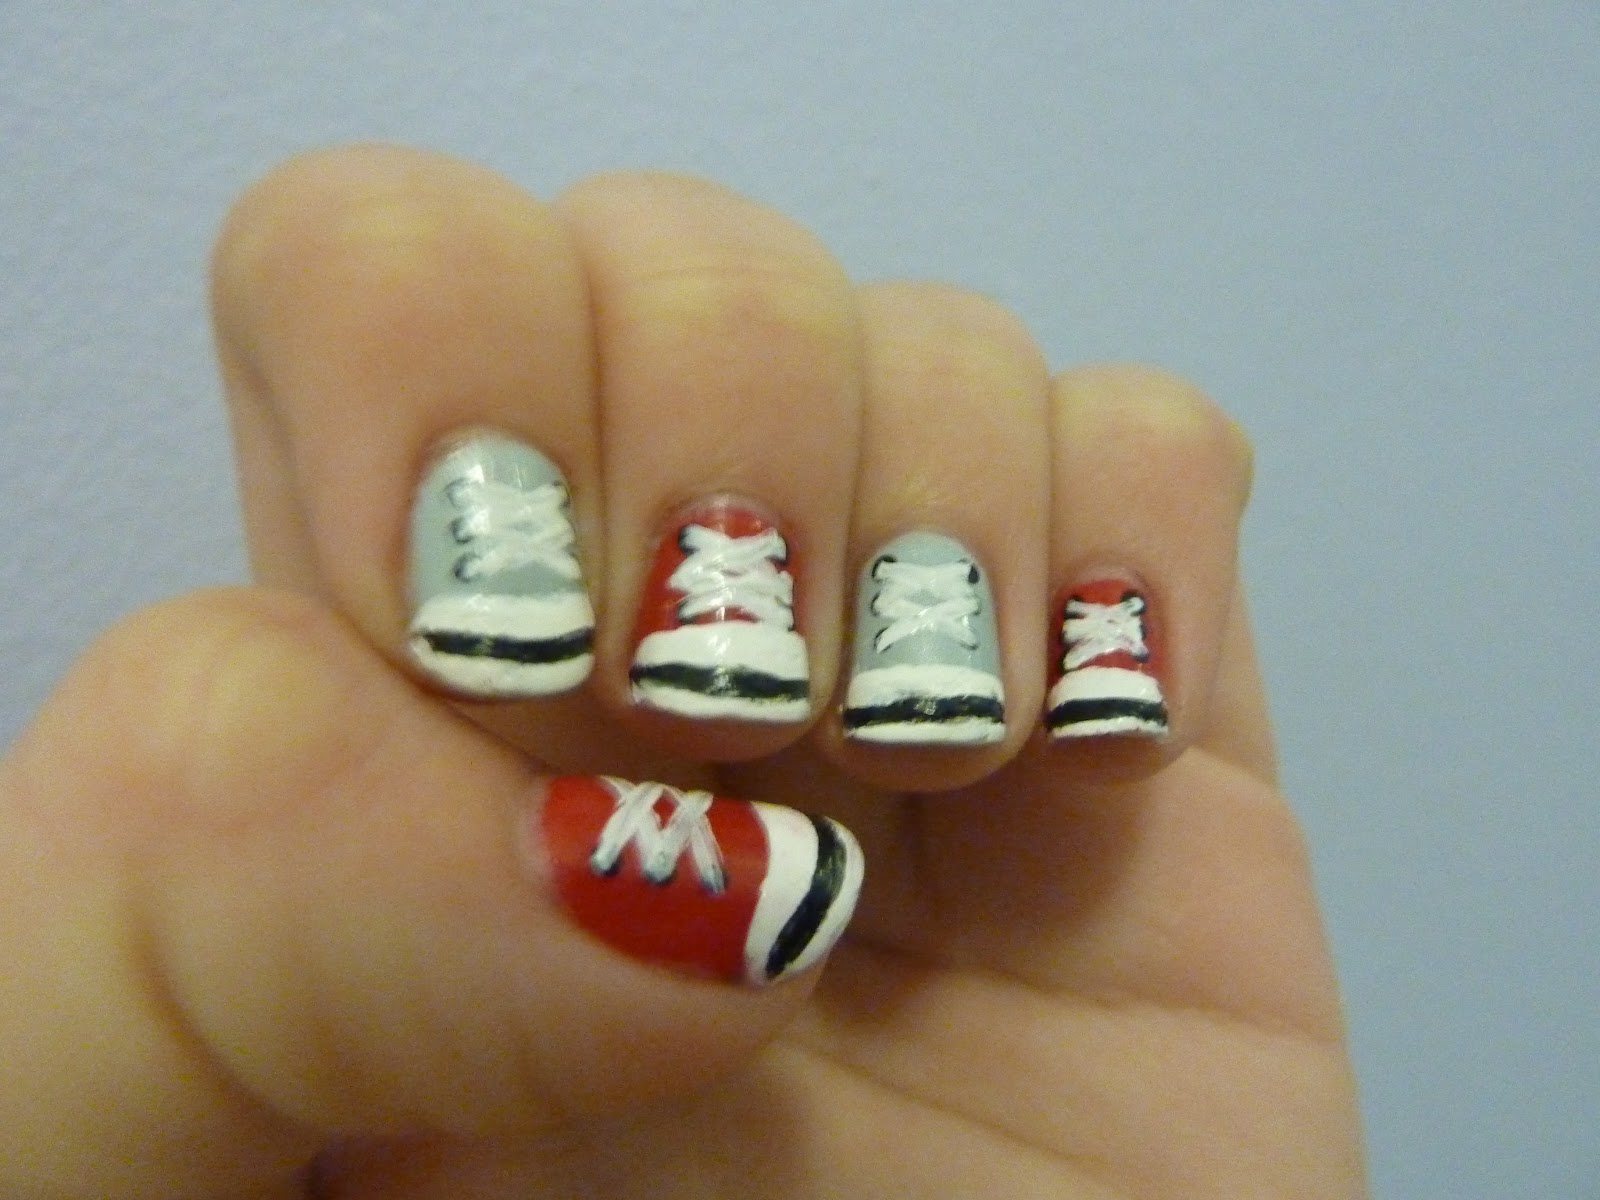
Here are the nails:
Mine are on the left and hers on the right!
Please excuse the lack of proper cleanup/lighting, I took this at her house with a cell phone and didn't have my tools :( However I think both of our manicures turned out pretty cool! I love the polka dots n her tips, we both noticed that you can see them from underneath as well! Pretty awesome XD
Sorry for not doing Christmas nails, but I don't celebrate Christmas (I'm Jewish) and I don't really see the point in doing them for that reason, nor do I have time to do them before I leave for Texas. 
I hope you enjoy these, and keep reading for more mani awesomeness! :)
By the way, did you know that a squid has 3 hearts?
Happy eating ;)
'Til next time,
Caroline S.
<3

It's My Birthday! (Well, Was...)

Hi everyone!
Sorry for not posting for so long again... I've been very busy as the end of the year approaches, having tests to take, gifts to buy, projects to finish, and parties to attend. I'm glad that winter break is here--I really need some time off! :)
We're going to Texas tomorrow, and since I have time I've decided to post the last two manicures that I have done. The first is my birthday manicure!
My birthday was actually last Sunday (the 16th), but I really didn't have the time or energy to post this manicure until now, so here it is! My friends, Izzie and Sarah, made me a bunch of nail polishes! Also, my friends E and H got me an Essie, Sexy Divide (a gorgeous purple with a not-so-appropriate name XD). Thanks guys :) :) :)
For this manicure, I used the new Essie as the base, topped it with several polishes whose names I cannot remember/do not know, and topped it with the homemade glitter franken made by my friends, Singing Star. I really like how it turned out! Here it is:
Yes, I know, it's a crappy phone picture... I couldn't find the camera until after the manicure chipped, so there wasn't much I could do about that :( Oh well, I guess it was able to capture the essence generally :)
Can you tell what it is? It's birthday candles!!! The glitter is the flame :)
I hope you like it, and keep reading for more colorful goodness ;)
'Til next time,
Caroline S.
<3


Sunday, December 2, 2012

I Mustache You A Question...

Hi everyone!
I've been trying to get the photos on my camera to upload on my computer, and it finally worked! Now I can post these new nails :)
In honor of Movember (I know it's December now, but I did these when it was still November), I did mustache nails! In case you don't know what Movember is, basically it's just people trying to raise awareness for cancer in men. And guess how they do it? By growing mustaches! Since I am unable to grow a mustache, I decided to follow many other nail bloggers and paint mustaches on my nails. I used one of the wonderful new Deborah Lippmann polishes from Ellen (thanks again, Ellen!), but the polish didn't have a label so I don't know the name. I topped it with Wet and Wild Black Creme for the mustaches, and voila! Perfect mustache nails, with a different style on each finger. Here are the nails:
In this picture, they look very orange. I can assure you that they are actually pink, however the lighting got the best of my camera and turned them a very creamsicle-esque shade of orange. 
They're also interactive:
Why? Because who doesn't love pictures of adorable baby pandas with mustaches. The shade of the polish is a bit more accurate in this one, but it's still quite a bit pinker than it appears. 
I hope you like these! I'll be busy this coming weekend as well as next, but hopefully I'll be able to fit in some designs soon (especially because my birthday is coming up!). 
Enjoy, and stay tuned for more nail goodness! 
'Til next time,
Caroline S.
<3


Tuesday, November 20, 2012

Quick Update!

Hi everyone!
Sorry to be posting so late, but I just wanted to give you guys a quick update. I'm working on a few more frankens, all full of glitter topcoat-y goodness! Unfortunately I can't post pictures yet, because the labels aren't finished, but I'll try to post them tomorrow. Good night, and keep reading for more!
'Til next time,
Caroline S.
<3

Sunday, November 18, 2012

That Perfume

Hi everyone!
Sorry it's been so long since I posted (again!). I hope it's okay that I've been posting less frequently, but lately I just haven't had the time to post that often. Because I had a bit of free time (and I really needed to trim my nails), I decided that today would be a good day to make a new franken. I had bought some glitter a while ago, and I had an almost-full bottle of topcoat. I mixed a few different glitters in, but I eventually decided on a gorgeous green micro glitter that was perfect for a polish (especially because I love green polish!). I poured in all the glitter (which was really messy), and... voila! A brand new franken polish!!! I decided to name it That Perfume, after a new Gumi Megpoid song that I recently found. It's a really good song, you should listen to it!!! Gumi's hair is green, so I thought that naming it after one of her songs would be perfect. After I made the polish, I painted my nails with a two base coats of Sinful Colors Innocent, just so that the polish (which is a glitter topcoat) wouldn't let my bare nails show through! After Innocent dried, I put on two coats of That Perfume, which covered the nail perfectly--not an overload of glitter, but not way too sparse like some glitters I've owned before. Here are the results:
Sorry that my fingers are covering up part of the label, but you probably knew what it said already! As you can see, not only does the polish itself look pretty, but I tried to make the label look nice, too. The label on my last franken wasn't terrible, but it wasn't anything special, either. I actually took the time to cut out the pretty heart shape on this one! :) I hope you like it, as I definitely do. The only problem is that the glitter keeps floating to the bottom, but I guess that's to be expected of this kind of franken.
I'll be away over thanksgiving, but I might be able to post soon after that!
Have a great thanksgiving, everyone, and keep reading for more nail art!
'Til next time,
Caroline S.
<3

Tuesday, October 30, 2012

You and Me, Rendezvouz?

Hi everyone!
I'm sorry that I haven't posted in a while... what with high school applications and a ton of schoolwork, I've been having trouble finding the time to paint my nails! However, now that hurricane Sandy is here, school has been cancelled in the city for 3 days! I've had hardly anything to do, so I decided to do my nails. Since I've recently been listening to a lot of vocaloid music, I decided to do nails based on one of my favorite songs: Matryoshka! It's kind of a creepy song, but I definitely recommend it (especially because I love Miku and Gumi). Vocaloid is really hard to explain, so for those of you who have never heard of it, just look on vocaloid wiki for more information. I guarantee you'll love it! For the base I used Sinful Colors Innocent, Borghese Rapido in Marino, OPI InStyle Red, and of course Wet and Wild Black Creme. Here are the results:
In the song's famous cover art, Miku's hoodie is green and Gumi's hoodie is red. I painted crooked "french tips"(more like half-nails) to represent the vocaloids' hair, which is blue and green, respectively. Finally, I added black markings to represent the face markings in the cover art. I was rushing a bit when I did these, but i think they came out okay! 
Now, in honor of both the vocaloids and Halloween (which is tomorrow, yay!), here is a list of my top ten favorite creepy vocaloid songs:
10. Daughter of Evil
9. Servant of Evil
8. Crazy Clown
7. Fear Garden
6. Creepy Toast (not really creepy, but it's still a funny song!)
5. Dream Meltic Halloween
4. Trick and Treat
3. Mrs. Pumpkin's Comical Dream
2. Alice of Human Sacrifice
1. Kagome Kagome (Circle You, Circle You in English)
And that's it! These songs are definitely perfect for your next Japanese Halloween party. 
For those of you who are being affected by Sandy, stay safe!
I hope you enjoyed this post. Keep reading for more nail art!
'Til next time,
Caroline S.
<3


Thursday, October 4, 2012

There's Antimony, Arsenic, Aluminum, Selenium...

Hi everyone!
Recently I painted a very scientific (not really) design on my nails: Elements nails!!! Although I did not include any Antimony, Arsenic, Aluminium, or Selenium in my design, I still love it. I decided to go with a very simple design, which involved painting the atomic symbol and number on each finger in different colors. For the base I used Wet and Wild White Creme, and I used my assorted (unlabeled) Sephora by OPI polishes for the designs. On the thumb I did Sodium (whose atomic number and symbol are 11 and Na). On the pointer finger I did Yttrium (37 and Y). On the middle finger I did Iridium (77 and Ir). On the ring finger I did Phosphorus (15 and P, yay phosphorus!! My favorite element...). Finally, on the pinky I did Neon (10 and Ne)! They are a little hard to read, but hopefully that should clear things up. Here are a couple of pictures:

The top picture shows the whole hand, while the bottom picture shows just the thumb... sorry if it's too hard to read!!
Anyway, I hope you guys enjoyed this. I think I might be posting less frequently now, if that hasn't already been happening. I'll still try to post as often as possible, but I just don't have as much time. I'll probably post once every 1-2 weeks. Hopefully that's okay!! (o^v^o)
Keep reading for more nail art!!
'Til next time,
Caroline S.
<3

Sunday, September 16, 2012

Sweet as Honey

Hi everyone!
Happy New Year, or as you might say, Shanah Tovah Umetukah (for all of you non-Hebrew speakers, that basically means "have a sweet new year"). It may be a few hours until the holiday actually occurs, but today's post is--you guessed it-- Rosh Hashanah themed! I'm Jewish, and Rosh Hashanah is an extremely important Jewish holiday that just happens to be the Jewish new year! But you might have guessed that. Anyway, naturally I just had to do Rosh Hashanah themed nails. I did a mix-and-match mani with random designs on each nail. After the first few, I wasn't really sure what they even were. The thumb is a shofar (a ram's horn which is blown during the holiday), the pointer finger is an apple (eaten with honey to symbolize having a sweet year), and the middle finger is a beehive (for the honey). The ring finger and pinky are just random, pretty designs, and I think the ring finger might have some honeycomb on there. The majority of the polishes that I used for the design are unlabeled yet gorgeous minis from Sephora by OPI that were given to me by my wonderful aunt (Thanks Liz!). However, I did  get to use one very special polish on one finger (not that all polishes are special!). When I was away in California, I had the amazing opportunity to travel to the lovely Tallulah boutique in Healdsburg (which is in Sonoma County) and buy my very first indie polish! This one was made by the wonderful nail artist who runs Sonoma Nail Art. If you haven't seen her blog, do check it out! She does wonderful work, whether it's with detailed portraits or simpler, adorable patterns. The polish is called Russian River, and it's the most gorgeous mix of blue and grey glitters in several shapes and sizes! In addition to Russian River, I also used Illamasqua Taint, NK Grin, and a billion of those Sephora polishes (the kit came with 16 minis and one regular sized bottle!) Here are the nails:
The words on the bottom of the thumb say "shofar". Sorry about the awful cleanup job... The orange polish was beautiful, but trying to clean it up got quite ugly!
I'll be pretty busy over the next few weeks (what with schoolwork and the High Holy Days), but I'll try to post a bit more!
Keep reading for more manis!
'Til next time,
Caroline S.
<3

Tuesday, September 4, 2012

Teacher's Pet

Hi everyone!
Before I begin, I'd like to apologize for being gone for sooo long... I was away in California for 10 days, and when I came back I had to prepare for school. I finally found time for a design tonight... the night before school starts! So, here you go.
I thought about a stereotypical school-themed item: an apple. I decided to paint apple french tips! I'm not used to experimenting with french tips, so my design isn't exactly perfect. None of my designs are perfect. But I do like how this came out!
I started with a base of OPI Did You 'Ear About Van Gogh? Then I added apple tips using OPI InStyle Red. Finally, I added leaves and stems with NK Grin and Illamasqua Taint. Here are the results:
Yes, I added a watermark... Technically, it's not actually a watermark, but it is there for the same reason: to protect my work. I used eyeliner to do this... hahaha. Oh well. If you don't like this, please comment. I don't want anyone to stop reading my blog because of an invading watermark.
I'm going to be quite busy now as I'm starting school, but I'll hopefully be able to post more frequently than I did this summer because I won't be going away any time soon. I hope that no one minds I've taken a break!
Keep reading for more fall-themed fun!
'Til next time,
Caroline S.
<3

Wednesday, August 15, 2012

OMG, So Kawaii!

Hi everyone!
I recently started learning Japanese, so I decided to practice writing a few characters by painting them on my nails! I don't have the best handwriting, and I might have written the characters or the words themselves wrong, so correct me if this doesn't look right:
I wrote two characters per nail, and the thumb has a little character that I made with my friends. The whole thing says "Kawaii Desu!!", which means "Is/It's cute!!". The background of the nails is supposed to  be note paper, which I hope is pretty obvious. Here are the individual nails, showing the characters as they are supposed to be written, from left to right:


So, I hope you like these! By the way, sorry about the wacky format... these pictures just wouldn't cooperate!
Oh, and one more thing...
I won Princess Polish's contest! Technically, I only got the silver medal, but that still ensures that a yummy chrome Essie is coming my way!
If you haven't visited it before, do check out her blog. It's really cool!
Keep reading for more manis!
'Til next time,
Caroline S.
<3

Sunday, August 12, 2012

A Day At The Spa

Hi everyone!
Today I just got back from my weekend-long vacation. However, next week I'm going to California for  about a week and a half, so I won't be posting during that time! Fortunately, I'm working as hard as possible to post at least two more times this week, possibly more.
Before I did my nails tonight, I decided to come up with a plan so that I didn't have to keep getting more colors and redoing things if they didn't look right. I (quite randomly) decided to do spa nails!
The thumb is a bowl of salad (refreshing!), the index finger is a bottle of nail polish, the middle finger is a bunch of pebbles, the ring finger is a face with cucumbers and face mask, and the pinky is a towel that says "spa" (though I accidentally painted it upside-down... oops!). Here are the results:
Am I a fan... Frankly, I'd say these nails creep me out a little bit. My favorite by far is the salad, and even that didn't turn out as planned. However, the worst part was the base coat. I used Deborah Lippmann Sarah Smiles, a sheer, light pink. Since I wanted to have an opaque base, I ended up doing four coats and probably needing a fifth! Fortunately, that was mostly covered up by the designs.
For the designs I used Wet and Wild Black Creme, Wet and Wild White Creme, Sinful Colors in a green I don't know the name of, OPI InStyle Red, NK Grin, Illamasqua Taint, and Simple Pleasures peach polish.
I'll probably be doing another design on Monday or Tuesday. It depends when I have the most time!
No word yet on the olympic nail art contest. Hopefully the winners will be announced soon!
Speaking of the olympics, did anyone else love the closing ceremony? I really loved it, and it is so wonderful to see the amazing athletes doing what they have trained their whole lives to do.
On that note, have a wonderful week, and keep reading for more nail art!
'Til next time,
Caroline S.
<3

Tuesday, August 7, 2012

Just Kisses

Hi everyone!
Today I was stuck inside with a bit of a cold, so I decided to paint my nails again out of boredom! I came up with the idea to paint a lips pattern using only three colors: NK Grin, Wet and Wild Black Creme, and Simple Pleasure red polish. I really like the results!
Here are the finished nails:
I started by painting my  nails with a base coat of the green Grin. Next, I painted little lips shapes with Black Creme. Finally, I topped it with the red and touched up the centers with more black.
I really like how these turned out, even though they took so long to paint! However, I think it was worth it. Besides, I finally figured out a better way to photograph my nails! I found a place in my apartment with perfect lighting and a pretty backdrop. Yay!
In addition to this awesome manicure, my grandmother recently sent me a package with so many different nail polishes! Thank you so much, grandma! I will definitely put them all to use!
Keep reading for more nails!
'Til next time,
Caroline S.
<3

Monday, August 6, 2012

Tribal Dance

Hi everyone!
I'm back with my newest design, a retake on my original tribal design!
You may have seen the original post that I did on my tribal nails. If not, the link is here. Anyway, being one of my first blog posts, looking back now I realize that it was pretty poorly painted and photographed. So, I decided to compensate by creating a better, simpler, and well-photographed version of the ever-popular tribal mani. This one is very simple, since it was done with only two polishes: a base of OPI Did You 'Ear About Van Gogh? and with accents of Wet and Wild Black Creme (btw, I'm really loving this black). In addition, unlike the original design that I did, this one features only one pattern. Finally, I actually got a much better photograph!
Here is the finished design:

Okay, so I'm still working on the photography skills... To my defense, the camera I'm using isn't exactly a Nikon... oh well. I'll get it right eventually. 
On another note, I will find out the results of Princess Polish's contest on Sunday! I probably didn't win,  but there's always a chance! Anyway, I just love looking at all the contest entries. 
I hope you like these nails! Keep reading for more manis!
'Til next time, 
Caroline S.
<3

Friday, August 3, 2012

Go For Gold!

Hi everyone!
Yesterday I found out some bad news... my nail art brushes are shipping from HONG KONG!!! That means they won't be here until the middle of August. However, I went on a search at the nearest beauty store (Ricky's) and found some amazing brushes in the testing area! They are just eye makeup brushes, but they reminded me of nail brushes, so I got some. It just so happens that they worked amazingly, and I was able to complete my newest manicure, which also happens to be my entry in Princess Polish's Olympic themed manicure! I will hopefully receive my order soon, but until then I will be making the best of these brushes.
The contest entries were supposed to be Olympic themed, so I thought about the most original ideas that I could. Finally, I decided on making opening ceremony-themed nails! The thumb features the rings and the words "London 2012, Go For Gold!". The index finger has a smokestack for the Industrial Revolution, the middle finger has a crown for the Queen, the ring finger has an umbrella for Mary Poppins, and the pinky has a British Flag, of course! I am really happy with these, and I hope they win the gold medal (or the gold nail polish, that is)! Here are the nails:
This picture was taken before I added topcoat. Unfortunately, though the topcoat dried very fast, it smudged the nail art and pulled at the designs, leaving some parts of the mani a streaky mess. Fortunately, another mani should be coming soon!
I used sooo many polishes to paint this mani. Here are the names (I also mixed several polishes to create different colors): Wet and Wild White Creme, OPI Did You 'Ear About Van Gogh, Simple Pleasures pink polish, Sinful Colors (A shade I can't remember the name of), Essie Aruba Blue, Simple Pleasures blue polish, Wet and Wild Black Creme, Love and Beauty Light Yellow, OPI InStyle Red, NK (also a shade with a name I can't remember.. both of these are new polishes), OPI Little Brown Dress, OPI I Vant to be Alone Star, Simple Pleasures purple polish, and Wet and Wild Metallica!
I am really excited about these, and I can't wait to see the results of the contest!
Keep reading for more nail designs!
'Til next time,
Caroline S.
<3

Wednesday, August 1, 2012

Tumblr Time!

Hi everyone!
Sorry It's been so long since I've posted... All my tools are ruined, and I really can't do much until my new ones arrive in the mail. I can't believe they haven't come yet!
On the bright side, I just finished the blog's new tumblr! It's got the same name as the blog: Happy Lacquer Girl. The web address is: http://happylacquergirl.tumblr.com/ ! I haven't posted anything yet, but I will start posting on both tumblr and blogger as soon as my new nail tools come. I have decided to enter Princess Polish's olympic-themed nail art contest! I'll post my entry as soon as it's finished.
Don't forget to check out my tumblr!
'Til next time,
Caroline S.
<3

Friday, July 27, 2012

Who Spilled The Polka Dots?

Hi everyone!
I am so sorry that I stopped blogging for so long. I kind of had to, since I was away at camp! However, I am really glad to get back to blogging, especially because I only had time to paint my nails once the entire time that I was away!
I have been in sort of a polka dot obsession phase, in which I have been trying to incorporate polka dots  into so many of my designs! My most recent pedicure involved polka dots, the manicure I am about to show is polka-dot themed, and my next pedicure will be very similar to the mani I have on.
The design I did today uses just two colors: light purple (Sephora by OPI Iris I Was Thinner) and black (Wet and Wild Black Creme--I finally ran out of Ebony Hates Chris, and the black creme has a much better formula and about the same drying time, even though EHC was a supposedly fast-drying polish). I painted the base using the purple, and I then did an accent finger with the black. Next, I used my beloved, tiny dotting tool to randomly dot the tips of my fingers with the black polish (except for the accent nail, which I dotted with the purple). I continued to dot down to the cuticle, spacing out the dots more and more as they got lower down on the nail.
And that's all there was to it! It was so simple, I'm going to paint the same design with a different color scheme on my toes later. You could also do a variation by dotting the nail with two different colors... perhaps black and white would work? It depends on what works best with your base color.
Here are the results:
Ignore the white thing in the corner, that's just part of my lamp!
My nails grew so much over the summer, but unfortunately all of them broke completely :( I've been trying to grow them back, but I think I like the length that they're at now... but I might grow them just a little bit more. However, I do really like the shape!
Also, for those of you who are on Tumblr, I might be getting an account to add on to this blog... the main posts will be up on here, but I will post pictures on the Tumblr!
I can't wait to catch up on all my missed blog posts! Keep reading for more nail designs!
'Til next time,
Caroline
<3

Saturday, June 23, 2012

Cabin Fever

Hi everyone!
Tonight is (unfortunately) my last post before I'm off to camp! However, you can expect some goodies as soon as I get back. After all, it's only 4 weeks!!
You can, however, look at this post tonight. Hopefully it will tide you over for a while, as I happen to have worked very hard on this, and personally I absolutely love it.
I chose to paint something involving my camp. Because the counselors there are from so many different countries, I decided to paint flag nails! Yesterday I made decals using the plastic bag technique. This involves painting a design onto a plastic bag and waiting for it to dry overnight, then peeling it off and sticking it to your nails. I then painted my nails silver and stuck on the decals. For the base I used Wet and Wild Metallica. Unfortunately, I used so many colors for the flags that I can't remember them all! I am only sure that I used Wet and Wild Ebony Hates Chris, Sinful Colors Snow Me White, and Essie Aruba Blue. I did the Hungarian flag on the index finger (which ended up looking a bit like the Italian flag in real life, oops), the Australian flag on the middle finger (my favorite out of all of them, too bad it experienced the most chipping), the British flag on the ring finger, and finally the American flag on the pinky.
The thumb is slightly different. To represent the trusty girls' side sign (appropriately placed right outside of girls' side and covered with girly flowers, peace signs, and hearts), I painted the word "camp" on top, then added a funky flower, peace sign, and a heart at the bottom. I used Simple Pleasures in a bright pink shade for the base coat, then added Wet and Wild Ebony Hates Chris, Sinful Colors Snow Me White, China Glaze I'm With the Lifeguard, Essie Bikini So Teeny, and finally OPI InStyle Red.
Here are the nails:


Now for a better view of the thumb:
Sorry for the blurriness, it's so dark where I had to take my photograph, even with extra lights on!
I love these nails, and I hope you do, too. I apologize for the poor cleanup, as my cleanup tools are not doing so well lately. I'll try to fix that when I get back.
Anyway, enjoy this post as it'll be the last one for a while! I can't wait to post again when I get back!
'Til next time,
Caroline S.
<3

Friday, June 22, 2012

Nyan Nyan Nyan

Hi everyone!
Judging from the title, I assume everyone reading this is already annoyed with or extremely excited about nyan cat's cuteness. I personally LOVE nyan cat, and when several people suggested nyan cat nails, I knew I had to do them (By the way, these are the last of the "catching up" manis, and I will post my final, NEW mani tomorrow before I leave for camp!). I picked out Essie Aruba Blue for the base, then used my new nail art brushes (which finally came) to paint nyan cat using OPI Did You 'Ear About Van Gogh, Wet and Wild Ebony Hates Chris, Wet and Wild Metallica, Nerds Strawberry mixed with Sinful Colors Snow Me White, more Strawberry, and Simple Pleasures peach. Then I (very messily, since there wasn't very much light in the room when I was painting them) striped on some rainbow colors using OPI InStyle Red, Essie Orange-It's Obvious!, Love and Beauty Light Yellow, China Glaze I'm With the Lifeguard, Nerds Blueberry, and Sephora by OPI Iris I Was Thinner (thanks for the polish, L!)
Here are the nails (again, sorry for the messiness! The lighting, getting used to the new tools, and the thickening of several polishes made it much harder to paint this time...):
And the thumb, close up:
So, I hope you like these!!!
My next mani, if all goes well, will be based on four different flags and my camp logo (the counselors at my camp are from lots of different countries, and the four I will be painting are the most common places that they come from!). I will also be  testing a technique used to make nail decals. This will make it easier to paint designs and stick them on my nails when they are dry! I have already made the decals, but I will make you wait until tomorrow to see them *mwahahahaha*.
Anyway, enjoy! I can't wait to post tomorrow! Good night!
'Til next time,
Caroline S.
<3


Thursday, June 21, 2012

Under the Sea

Hi everyone!
In an attempt to catch up on all my posts, I have been worrying all day that I wouldn't have time to fit in this post. However, I seem to have a bit of free time to post right now, before I go and work some more on my next manicure. This manicure was inspired by mermaid/fish scales, and like the last one it was done before I had gotten my new tools. Because of this, I had to come up with something that I could do with my dotting tools. I decided to do this! It is inspired by the tutorial over at Little Nails. Check out this blog, it is really great!
I used several blues- I believe it was Essie Aruba Blue as a base (which I have been using a lot recently), as well as dots with more Aruba Blue, Wet and Wild Rain Check, Nerds Blueberry, and two or three others that I just can't remember :P
Anyway, here it is!
I apologize for the messiness on several of the fingers. It took such a long time to do, and it really wasn't like anything I had ever done before. In the end, I didn't want to take it off and restart before photographing it.
I had this on for about a week (whoa, that's probably the longest I've ever had on one mani since forever!), and I experienced no chipping. That's right, not even a little.
I kind of like this, but in order to do it again and like it better I'd need to practice more. If I did this, I would probably like it a whole lot!
'Til next time,
Caroline S.
<3

Wednesday, June 20, 2012

You're Toxic

Hi everyone!
I am soooo sorry for neglecting the blog... my computer broke and it took about a week to get it fixed. When I finally got it back, I was so busy that I just didn't have time to post. However, I now have this post as well as three manis lined up and at least 1-2 more coming (yay)!
This mani is a bit plain, as my tools recently went all wacky and they started to fray so much that I couldn't do anything with them. Because of this, I had to choose between using a sponge or dotting tools (or both) while I waited for my new brushes to come.
As you will see from this next picture, I chose to do a gradient with my sponge. I used Wet and Wild Ebony Hates Chris (two coats) as a base, and China Glaze I'm With The Lifeguard on the tip.
Here are the nails:
 The picture doesn't do them justice-- they actually looked very good in real life! However, I'm sure that  I would be capable of creating a much better gradient than this if the colors I used were similar.
I hope you like them! Again, I'm very sorry for the delay. I will try to post as often as possible until I leave for camp this sunday. Enjoy!
'Til next time,
Caroline S.
<3

Friday, June 8, 2012

Flor-all The Nails!

Hi everyone!
I am so sorry for not posting for so long... I have been away on a school trip all over the south of the U.S. for five days, and I have not had my computer let alone internet. Fortunately, I am back and basically done with school, so I will be posting as much as possible before I go away to camp. Before the trip, I decided to paint my nails with a design that was based off of the dress I brought on the trip for one place that we went. I used Did You 'Ear About Van Gogh as a base, then I painted an accent nail with a floral pattern that almost matched the pattern on the dress (except for the leaves). I then painted bows onto the tips of the rest of the nails. For the outlines of everything, I used Wet and Wild Ebony Hates Chris. I used an assortment of different colors for the flowers and the bows, including Essence A Lovely Secret (I need to find more of this stuff!), OPI InStyle Red mixed with Essie Little Brown Dress, a pink shade from Simple Pleasures, and several Wet and Wild colors that I just can't remember. Here are the nails:
Sorry about the mess around the cuticles... I just didn't have time to photograph them, as I had to wake up relatively early the next morning in order to catch the flight to Atlanta. However, these held up relatively well for the five days I have worn them. I only noticed mild to normal tip wear on them, and I saw no large amounts of chipping. Also, the topcoat I used made them shinier and stronger, though it unfortunately put some streaks in the black polish.
Here is a comparison shot with the dress:
The bows have nothing to do with the dress, I just thought they were cute. However, I think that the floral does have a resemblance to the dress, though it is very simplified.
Do you like it? Do you have any other suggestions? The most likely design coming up next will be inspired by Sun Studio in Memphis, Tennessee.
I hope you like these nails, and sorry for the long wait! This time will be filled with periods of tightly packed posts and no posts at all, since I will be away for half the summer and spending the other half painting as often as possible! Keep reading for more posts.
'Til next time,
Caroline S.
<3

Sunday, June 3, 2012

Girls Acting I-Katty

Hi everyone!
I'm really sorry I have been taking so long in between each post lately... I feel like I've been neglecting the blog! I've had finals, field day, and packing to do--I'm leaving for a 5-day school trip to Alabama, Georgia, Mississippi, and Tennessee tomorrow morning. Fortunately, I have two manicures lined up that I have been trying to find time to post, and here is the first one (unfortunately, the second won't be posted until next weekend). I decided to do ikat print nails after looking at posts on Mr. Candiipants (over and over and over again). I love her blog, and I really think you should check it out! She does some really detailed designs, and I love her floral prints. I decided to base my design off of her ikat tutorial. I would follow her, but I don't have a tumblr (yet!!!). I used my new shade, Essie Bikini So Teeny, as a base coat. It is a beautiful periwinkle blue, and it has a relatively good formula. Unfortunately, I noticed a lot of bubbles in it. This may be since I was carrying it around in my bag for so long! I used Sinful Colors Snow Me White as a base for the print (though I may have gotten carried away with the number of blobs). I then used a striper to blob on some Simple Pleasures peach colored polish. Finally, I made little strokes using Wet and Wild Ebony Hates Chris and topped it off with my new favorite topcoat, which comes from Indulge Beauty. I only have a tiny amount left, and I can't find it in stores! If anyone knows where to buy this, please let me know :)
Here are the finished nails (without topcoat):
Here is a closeup (with topcoat):

I hope you like them! Sorry about the cleanup, by the way... The black polish is really hard to clean without getting all over the place.
I also bought some new nail polishes, Essie As Gold As It Gets and Jordana Quick Dry Topcoat (AGAIG was on my wish list, and I have been looking for more topcoats to review).
I might have to get new nail art brushes soon, since mine are already fraying and are in poor shape. Oh, well... Amazon gift card, here I come!
'Til next time (which will be in about 5-6 days--sorry!!!),
Caroline S.
<3

Tuesday, May 29, 2012

Bookworm

Hi everyone!
Sorry I haven't posted in so long. I was away all weekend, and then I had to study for finals. Fortunately, I have an extra special post today! In honor of my last English class and my English final, I decided to paint each nail with a design inspired by each of the books we read this year in English class. I did Lord of the Flies, House on Mango Street, Of Mice and Men, Haroun and the Sea of Stories, and A Midsummer Night's Dream. Here are the results: 
From Thumb to Pinky: A Midsummer Night's Dream, Haroun and the Sea of Stories, Of Mice and Men, House on Mango Street, Lord of The Flies.
A closer look at my favorite design, House on Mango Street:
I couldn't even begin to remember which polishes I used, since I used sooo many! However, I know that I used Did You 'Ear About Van Gogh for the base of the pinky, and I can say firsthand that this is one amazing formula. The brush ensures a perfect application, and the formula is super smooth and dries quite fast. In addition, it is a one-coater! This manicure took about 2 hours to complete.
I hope you liked this, and keep reading for more coach-inspired goodness!
'Til next time,
Caroline S.
<3

Thursday, May 24, 2012

Don't Worry, The New Neighbors Are Friendly

Hi everyone!
Today I did My Neighbor Totoro nails! For those of you who don't know, My Neighbor Totoro is a japanese anime movie about a family who moves into a house surrounded by adorable creatures: Chu Totoro, Chibi Totoro, and Totoro. The house is also occupied by soot sprites, which are cute little black dustballs. Here are the nails I did!
From pinky to thumb: Umbrella, Totoro, Cat Bus, Soot Sprites, My Neighbor Totoro
Here are some shots showing the message on the thumb (My Neighbor Totoro, of course!):

So there you have it! I used Essence A Lovely Secret as a base, Sinful Colors Snow Me White, Wet and Wild Ebony Hates Chris, Illamasqua Taint, OPI Did You 'Ear About Van Gogh, Simple Pleasure pink, Love and Beauty Light Yellow, OPI I Vant To Be A Lone Star, and OPI InStyle Red.
I hope you like these! I did another manicure that I will be posting shortly, and then I'm off for a weekend away with friends! Stay tuned for a fun, book-inspired mani!
'Til next time,
Caroline S.
<3

Sunday, May 20, 2012

Flowery Fingertips

Hi everyone!
I just came back from a fun but exhausting day at Six Flags. I had forgotten to post this, so I finally found time to do so today. I painted my nails blue with Essie Turquoise and Caicos, and then I striped and dotted each nail with Sinful Colors Snow Me White. Afterwards, I painted roses all over each finger with Simple Pleasure pink, OPI InStyle Red, Deborah Lippmann Sarah Smiles, and Layla Magneffect Mojito Green. This is how they turned out:
I worked really hard to clean this one up, and I think it came out really well. Unfortunately, my cuticles are really dry in this picture. I hope no one minds! Otherwise, I think it looks great. I will be posting again as soon as possible!
'Til next time,
Caroline S.
<3

Thursday, May 17, 2012

Did You Hear? It's The Arts Festival!

Hi everyone!
Sorry I've been so long (or at least it feels that way)... I am really busy as my school finals are in 2 weeks! I have, however, been making an effort to paint my nails whenever I have free time. Expect another mani soon for my my awesome friend's bat mitzvah!
Tonight was my school Arts Festival, so I was busy participating in three things: 7th grade circus, Glee, and Guitar Ensemble. For the circus I had to hula-hoop, so I decided to paint my nails to match the hoop! Unfortunately I couldn't get a picture until after I did all this, so they got totally ruined :( Oh well, they still look better in real life. I just can't believe that I chipped the pinky *that* much. I apologize for the awful picture, hopefully I can get a better picture of my next mani.
Ugh... cameras are so unforgiving :(  I used Wet and Wild's Wild Card as a base (a pretty purple, goes on in 3 coats and dries relatively fast). Then I sponged on some Chanel polish in a red color (I don't know the name, but it's got a nice formula--plus I got it as a gift). Finally, I used my striper brush to make the red lines going across my middle and ring finger with more Chanel polish.
I hope you like it, and sorry for all the chipping and dents!
I may be missing for a bit in about 3 weeks, since my grade is going on a week-long trip all over Alabama, Tennessee, and more. However, a week after that I have no school, and the last week will ensure that I am certainly not busy. Until then, expect slightly less frequent posts!
'Til next time,
Caroline S.
<3

Monday, May 14, 2012

The Very Hungry Caterpillar

Hi everyone!
I'm very busy now, but I still found time to do my nails. :) I got some loose eyeshadow, so I decided to make my first franken. I used about 1/3 of a container of Jordana eyeshadow in Going Green, and mixed that with about 3/4 of a bottle of Wet and Wild's clear nail protector and a drop of Sinful Colors' Snow Me White. I decided to call it The Very Hungry Caterpillar because it made me think of that children's book with the same name (by Eric Carle). Here is how it turned out:

Note: It's not nearly this fluorescent green in real life, but it's really dark in here and I couldn't even get a decent picture. Sorry! It's actually a very pale, shimmery green. However, the green appears to have slightly red-orange shimmer, if you look really closely into the bottle!
I swatched the polish, but I decided it would look better with some very hungry caterpillar-inspired nail art! Here it is:
This photo shows the color more correctly. I used tvhc as a base, then drew on some dots with Layla Magneffect in Mojito Green. I painted the head with an unnamed Chanel le Vernis red. I drew the legs and antennae with Illamasqua's Taint, and then I drew the eyes with Love and Beauty's light yellow and more Mojito Green. Finally, I added a black mouth dot with Wet and Wild's Ebony Hates Chris (of course).
I hope you like this!
'Til next time,
Caroline S.
<3

Saturday, May 12, 2012

Flamin' NOT

Hi everyone!
Today I decided to do flame nails (all my friends wanted me to!). I used a makeup sponge  to do a flame-like gradient. For the gradient, I used Love and Beauty's Light Yellow, Avon's Orange Creamsicle, Essie's Orange--It's Obvious! and red creme from Claire's. Here are the supplies I used!

Left to right: testing paper, Essie's Orange--It's Obvious!, Avon's Orange Creamsicle, Love and Beauty's light yellow, Claire's red creme, makeup sponge for gradient

Here are some progress pics (excuse the mess around the cuticles, I didn't tape them so the sponge got polish all over my fingers):
Finally, here's a picture of the finished gradient:
Again, excuse the cuticles--I could not get the glitter from the yellow polish off, no matter how hard I tried!
After that, I traced a flame design onto my nails and filled it in.

Most of the nails came out awfully! This was a nail fail. :p
On a happier note, I found a bunch of new polishes! They are Wet and Wild's Wild Card and Night Prowl, plus NYC's French White Cream. I really needed more white, and these were all on sale for 49 cents each... so why not? I do not have pictures of Wild Card yet, but it is a beautiful, shimmery grayish-purple. I tried it on my toes, and it goes on beautifully in three coats, though it is slightly sheer. However, it was opaque in three or four! It also dried relatively fast.
I swatches Night Prowl on my right hand:
This color was a beautiful, black jelly with fine purple glitter in it (yay jelly and glitter, it's like a pre-made glitter sandwich! I also love the colors!). It went on so easily in two coats. The first coat is sheer and jelly-like, but the second coat is completely opaque without letting go of the jelly-ness. Yay! I hate seeing vnl with jelly polishes. This polish also dried super-fast! Look out for it if you like vampy polishes :)
Anyway, happy Mother's Day! Be nice to your mum. Soon I'll be doing more nail art!
'Til next time,
Caroline S.
<3

Thursday, May 10, 2012

There Are Shoes on My Fingers!

Hi everyone!
Though this mani came out slightly messy, I think it's pretty cute. At school, my friends and I made my fingers walk around and moonwalk! We're very silly :)
I was deciding between flames, daisies/sunflowers, and converse, and as you can see converse won (however, the other two will be coming up as soon as possible, along with some pastel vintage roses).
Here is the finished product:
I decided to make use out of some of my new OPI colors, so I chose OPI's I Vant To Be a Lone Star (grey) and InStyle Red (red, obviously) as the two base colors. Both of these colors have black labels, so I'm guessing they were made before OPI started making their polishes 3-free... oh well! Unfortunately, the picture did not really capture the true color of the polishes, so I'll say that the grey polish has a blue hint to it that is much more apparent in real life, and the red polish is not nearly as orange-looking as it is in this picture. It is more of a deep cherry red. The red formula was not so great, though what was bad about it is hard to explain. It went on in two coats. However, the grey polish had an excellent formula, was easy to apply, and went on in three coats. For the accents, I used Sinful Colors' Snow Me White and Wet and Wild's Ebony Hates Chris.
I also picked up a new polish today: Wet and Wild's Wild Card! I will probably be testing this out on my toes, more pictures to come later. They're having a clearance sale on makeup and polish at the Duane Reade near my house, so I got this for only 49 cents! I might be going back tomorrow and getting some lipgloss (this was the only nice polish color that I wanted--they only had two others, and they were both pink). For now, enjoy this! More manis (and possibly pedis) coming soon!
'Til next time,
Caroline S.
<3

Monday, May 7, 2012

Queen of the Butterflies

Hi everyone!
Today I decided to try out my Avon nail polish in Orange Creamsicle. I used it as a base for a monarch butterfly design, since I keep seeing butterflies flying around when I'm outside. I also got inspiration from other bloggers' monarch butterfly manicures. To all of you who have done this, thanks for the inspiration! All of the designs I have seen are beautiful.
The Avon polish was a pain to apply, since it was a three-coater. This is actually the first three coat polish that I own, so maybe I'm just not used to it. It also took forever to dry, and it looked awful with my skin tone. So overall, I'm not a fan of this polish. However, I am a fan of this design!
I also picked up two new shades: Forever 21's Love and Beauty in Light Yellow and Gold. I am really excited to swatch them, and I used the yellow to highlight the wings on this design! For the black I used Wet and Wild's Ebony Hates Chris and for the white dots I used Sinful Colors' Snow Me White.
Does everyone like this design? I'm not sure about it, but I do think it looks pretty cool.
I've got to go, but I'll post another mani soon!
'Til next time,
Caroline S.
<3

Saturday, May 5, 2012

My New Organization System!

Hi everyone!
Sorry for posting so late, but I just got back from a very long day of bar/bat mitzvahs. Fortunately, I remembered to post this new system I am using to keep track of all my shades. I have made test sheets, on which I paint a coat of polish and write the name of the color next to it. I have organized the creams by color and grouped the glitters and effect polishes together. This also helped me to get rid of all the polishes that have dried or clumped together. Fortunately, I only found two, one of which I have two bottles of. It also appears that my crackle is not working as well as it used to, but I'll have to test that again later.
Here are some pictures of the test sheets:
So, as you can see, these make finding shades much easier. For now I am still storing my polishes in a shoebox (my room is too tiny to fit them anywhere else), but I may be transferring them to a drawer soon. Otherwise, this system is very helpful! Also, I can eventually add more as I buy more shades. 
I hope this is helpful, and keep reading for more posts very soon!
'Til next time,
Caroline S. 
<3